Tuesday, April 15, 2014
quick note
After a full day of rain (we spent it packing and scheming) there has been very little in the way of stretching or settling in the barrels. The nylon webbing (military surplus) we used seems immune to that. Tomorrow, we begin to address the deck and superstructure.

Monday, April 14, 2014
...barrel, barrel, ow, ow, ow, barrel, barrel......
Ugh. Lots of progress today, but we're paying for it physically, I can tell ya.....
On a cloudy and blustery day we ventured to our local Lowes, got the remaining pipe....that I forgot....and the plywood for the deck, and tied into building same.
Since so much of this construction is experimental, we're constantly rethinking things. I'd intended to use this really very clever scheme using stainless steel rings and 600 lb test nylon webbing to hold the barrels in place.
....didn't work. We wound up tying them, which will be inelegant, but fine.
So here's the method:
First, you start with your pet barrel. It's my pet barrel because it followed me down to the worksite....and very nearly into the alley, across a parking lot and into the side of a lurking Police car, but I digress.


On a cloudy and blustery day we ventured to our local Lowes, got the remaining pipe....that I forgot....and the plywood for the deck, and tied into building same.
Since so much of this construction is experimental, we're constantly rethinking things. I'd intended to use this really very clever scheme using stainless steel rings and 600 lb test nylon webbing to hold the barrels in place.
....didn't work. We wound up tying them, which will be inelegant, but fine.
So here's the method:
First, you start with your pet barrel. It's my pet barrel because it followed me down to the worksite....and very nearly into the alley, across a parking lot and into the side of a lurking Police car, but I digress.
We basically used a twisted rope--a "Spanish windlass"--to pull the barrels up into place. Since our frame is elevated and upright, we can't just tie them on as you could if building inverted or on the ground.
It took us a bit to hit on what method we were using to jack up and attach these. We finally wound up levering them into place from below with a couple of sticks, cinching them off with sash cord, and then tying them in two places with the webbing.
Here's the first row finished. Please note, you are NOT going to get these snugged tight. They'll hang moderately close to the pipes with a bit of slack between. That's okay. Water pressure will snug them up into their places once you get them wet. The challenge is getting them to the water in place.
Here's both ranks in place. This was FAR more strenuous and time consuming than we'd anticipated.
BUT it's done! The two front floats will have to wait until I can move the support piers....they're in the way...but we'll get the stuff for the new supports tomorrow and put them in Wednesday. Tomorrow, they're predicting another full day of rain, and it'll be interesting to see how much stretching or contraction the straps go through. Regardless, this was one more huge hurdle we had to get past. Wednesday, we'll paint and deck the hull (more on that later) and begin erecting the walls.
I'm pleased, I'm sore. stay tuned.
We'd love to get your comments (though you will have to have a wordpress or gmail account to sign in). Please let us know what you think.
Saturday, April 12, 2014
the folly of work

A tiny Mungo manifesto
I shouldn't, perhaps, complain. Despite being hideously underpaid for my experience ( I have a doctorate after all), I still make a bit above minimum wage, Despite having no benefits or healthcare through work, I do work with some very fine and convivial people. Despite having absolutely no say in my workplace, the managers in the store are pretty much not insane, and the hours aren't horrible......
but still....
...still about 2pm I found myself wishing the time would hurry, that the day would be over.
Lets consider that a moment: I'm 62. Why on earth would I wish for less time?
Yet I did. I found the time so onerous that I, in essence, wished to die sooner. How many hours, I thought, have I similarly wasted? How many days? Yet the oligarchs that control our lives, born to pamper and privilege, have created this life for us, our "job creators", to line their own already lush pockets, leaving our lives barely tolerable, barely there, and we are to fall to our knees and shout " oh lawsy lawsy, massa done give me a JOB!"
Really?
I grew up in the segregated South, far, far too close to the living sickness of slavery. I know Jim Crow. I'm white, but I know the smell.
I don't think so.
I can hear it now: "Waaa Waaa Waaa, you don't like your job. NOBODY likes their job. Man up and suffer."
I used to say those things as well. Then I got some life behind me. Then I watched people I loved being destroyed by chasing, as Spaulding Gray once said, "a carrot, and another carrot, and another carrot."
If we are to have no wages, no say in our workplaces, no benefits, no healthcare, no unions, no free time, a life full of pollution, debt and worry....then for whom is all this work? Not us, certainly. Do you think the hunter gatherers in the Nabib get up in the morning and say: "i wish this day were already over and I was a day closer to death"? Do we really think this is a natural condition for either man or society? I doubt the !Kung in the Kalahari ever entertain such thoughts.
Neither should we. I'm tired of it.
I'm building a boat. I'm reclaiming my own life.
Come join me.
Mungo
Friday, April 11, 2014
the weekend
As Im working all weekend, I don't anticipate getting a lot done. A bit of rain threatening today made me not schedule much work on the boat. Tomorrow evening we'll get the remaining pipe in place and begin attaching the barrels. Next week, which will apparently feature four good days and one deluge, should be a frenzy of work. Keep your fingers crossed for us that the weather holds.
I did get some of the reinforcing done on the existing stringers using a pockethole tool.
 Neat little toy lets you drill an angled starter hole and let us put a stainless screw from the opposite (stringer side) direction to further strengthen the connection to the outer rails.
I am sooooooo ready to get this thing completed.
m
I did get some of the reinforcing done on the existing stringers using a pockethole tool.
I am sooooooo ready to get this thing completed.
m
Wednesday, April 9, 2014
Of Pipe and Paranoia
So this morning's effort (and one of my worst fears)is getting the pipes through to hold the barrels. My trepidation was that the holes wouldn't line up exactly enough to put the 10' pipe sections through.


Hmmmmm
Fortunately, the pipe is easily flexible enough to accept variances of at least 1/2". The pieces slid through with very little effort.
Here's the first pipe in place.
One of my other fears, and one you should bear in mind if you try this, is where the couplings hit. The couplers are too large to fit through any hole you might reasonably drill for the pipes. Fortunately, I was lucky and none of them hit directly on the beams.
Though some of them were pretty close.
So here's a lovely shot of the first two pipe rails in place.
So where's the shot of the other two in place? Well I'll tell you: stupid here didn't buy enough pipe! Not quite sure how I did that, but the second rank will have to wait til friday.
Did a quick barrel test, though to make sure my dimensions were on (and, yes, I know they go on the bottom) and that there was enough clearance between the drums and the side rail. Yep. All is well.
I also, while we're on the subject of paranoia, did some reinforcing of the piers holding the frame aloft, adding some legs and other supports.
Don't think it would, but having this thing come crashing down at this point would be...um...bad.
So I'll be spending the rest of the day cleaning out and sealing the barrels, giving my back and my poor hand a rest from yesterday and prepping to strap them in place and add the deck. As they were full of vinegar, the yard will smell like a salad for the next nine days.
I don't mind, I like salad :)

I don't mind, I like salad :)
Barrels drying in the vinegar scented breeze.
Leave us a comment.
m
Tuesday, April 8, 2014
PROGRESS!!
As promised, today was beautiful if a bit breezy and we managed to get a TON of work done. Needless to say, I hurt in places I didn't know I had places, but it was worth it.
We began the day by splicing together the 30' 2"x8" beams that hold the sides together, using a generous 4' splice piece for the center seam and another 2' one for the tad we're adding at the bow.
 The use of these wide jaw vice clamps makes this a lot easier. Our splices were screwed with stainless steel screws from both sides and liberally smeared with polyurethane glue (Gorilla glue in this case). I would probably have preferred using something like titebond III, but newly minted treated lumber has a LOT of moisture in it, and water soluble glues won't hold properly until they've had several months to dry.
The finished beam is huge.

Two of them are huge-er
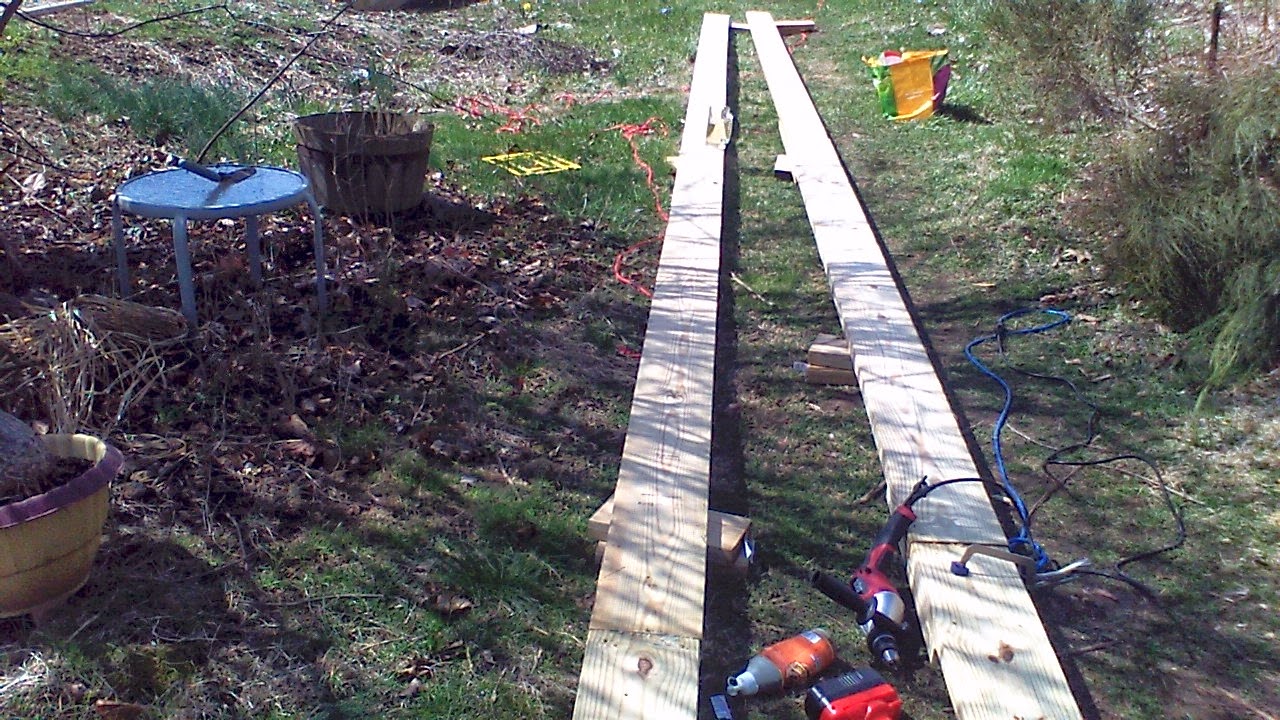 It was, of course, at this point that I realized that a) I'm working alone today and b) I have a splint on my right hand and, of course, c) THESE THINGS ARE FREAKING HEAVY. Rather than drag them down to the road where we were assembling, I got clever and clamped one end to a truck dolly. That way I had to lift only the front and the tail obediently followed along after me. You may be properly in awe :).
 Gonzo, I know, but it worked.
Leveling this thing was a bloody pain. The place we're building slopes in about six different directions, and since there's no real level visual point of reference, everything looks wrong at all times, even if its square and level. I kept checking myself because it never looked right. It is, though.....mercifully.
Once I finally got the murderously heavy beams....long enough to be floppy if they turn sideways.....hefted up and into place and relatively level, adding the stringers went pretty quickly. We did do a couple of things that really helped: One was using patio foundation blocks on the top of our piers to hold the wood steady and help us keep square.


We began the day by splicing together the 30' 2"x8" beams that hold the sides together, using a generous 4' splice piece for the center seam and another 2' one for the tad we're adding at the bow.
The finished beam is huge.
Leveling this thing was a bloody pain. The place we're building slopes in about six different directions, and since there's no real level visual point of reference, everything looks wrong at all times, even if its square and level. I kept checking myself because it never looked right. It is, though.....mercifully.
Once I finally got the murderously heavy beams....long enough to be floppy if they turn sideways.....hefted up and into place and relatively level, adding the stringers went pretty quickly. We did do a couple of things that really helped: One was using patio foundation blocks on the top of our piers to hold the wood steady and help us keep square.
heavy as all getout, but it did help keep things aligned
I also used a couple of joist hangers, just clamped in place, as extra hands while glueing and drilling the stringers in place. Once I got the rhythm of it, I would measure for the next stringer, clamp the hangers in place, predrill the beam, and then just glue and drop the stringer in and screw it in place. Worked rather well.
Here's the frame in process. You can see my block and brick piers. Yes, I know they're leaning. So was I by this time.
See what I mean? NOTHING looks straight, but trust me, it is.
By the end of the day (and my energy) I had the full frame put together and ready for the pipe and cross bracing and the barrels......tomorrow. Right now, I'm going to do rash and unpleasant things to a pizza, take a hot bath, and fall over.
Your comments and ideas are most appreciated, by the way. Please leave us a note.
M
Monday, April 7, 2014
Sunday, April 6, 2014
the weekend .....urgh


Tomorrow they predict rain, then five full days where I can get things done. YESSSSS!

And of course, as a caution, the score is :
Heavy treated lumber 1, Cheap plastic deckbox 0.
sigh...note to self....sawhorses.....
Thursday, April 3, 2014
Some Design Considerations
Well, since it's raining (again), I thought I'd take the opportunity to include some of the design considerations for The Floating Empire and how we reached them. I did get some things done today, picking out and remaining lumber for the raft hull as well as the 10' pipe sections at our nearby big box lumber store....only to tell them to kindly hold them for me til tomorrow as it had started pouring outside (handling a 16' 2" X 8" is enough of a challenge in GOOD weather). So with the stuff safely parked in the pick up section, I thought I'd wander around some of the ideas we're exploring with this project:


As I said in our intro (Beginnings....) , with rising sea levels a great deal of the world is likely rather quickly to go from merely low laying to uninhabitable, at least in the sense of conventional dwelling. Low ground becomes marsh which can quickly become swamp, displacing the residents into areas that may not be particularly happy to see them.
Then there is the matter of the growing gap between the ultra rich and everyone else, making our "money extraction society" less and less livable. Finding a way to unplug, to become more independent and self sufficient, is a way of preserving both autonomy and sanity.
And speaking purely personally, as a working artist entering my 6th decade, I had no real interest spending my remaining years saying "would you like fries with that?" or welcoming people to WalMart when I could be creating. Nuff said.
So here are the basics that we considered:
1) The vessel must be simple, of shallow draft, and easily constructed.
2) It must utilize large amounts of discarded or repurposed materials, and ALL of the materials used must be readily available.
3) It must be of quick and inexpensive construction.
4) It must get it's power from sustainable sources, including things like cooking, heating water, and propulsion.
5) It must be able to be configured to meet individual needs.
After a degree of casting about, we decided the simplest, most easily constructed option would be to make a barrel barge utilizing recycled Poly 55 gallon drums. I, of course, had a huge number of people (most of whom had no apparent experience with the things.) tell me that they would sink, collapse, explode, mutate into giant, genital eating Iguanas, etc etc etc. But I grew up in Alabama, and on the Redneck Riviera of the NW Florida coast, and these things were at one time ubiquitous. Even now, along the far too oft flooded Danube River around Belgrade, whole communities of Splovovi are springing up, floating on disused German chemical barrels and old Soviet era Iron (Here see: http://makezine.com/magazine/make-12/hands-on-floating-city/)
When we learned that the Rolling Barge company (http://rollingbarge.com/) was marketing Coast Guard approved, licensed vessels based on these things, It decided us. The food grade polyethelene barrels can not, by law, be reused for their original purpose, and are either recycled or sold as rain barrels. We managed to buy a mess of them in good condition for $10 each.
For the float structure there are a number of designs and plans available on the web. One of the more interesting we ran across was one used by the Moomers (http://boat.moomers.org/BoatWiki.html) on their Illinois raft trip. The structure used galvanized pipe to corral the barrels, thereby eliminating a whole lot of carpentry. We decided to give that a shot:
From the Moomer's website, barrels bound to pipe cross members.
Now came the matter of propulsion. Yes, I know, we could just get a used outboard, but we wanted to avoid the use of fossil fuels entirely if we could. Besides, where's the romance? We began to look into the humble paddlewheel.
Why paddlewheel? A number of reasons. First of all, the paddlewheel is very nearly unique in its ability to avoid being fouled by weeds, trash, cables, rocks, small and wayward swimming children, and other detritus in shallow water. This is because, unlike most other forms of propulsion, the paddlewheel does't have to be below the level of the hull it's pushing in order to work properly. Its "buckets" (the blades of the paddle) are all that has be be submerged as they turn in order for the thing to work. They also are madly efficient at low speeds, transferring as much as 90% of their energy into pushing the water. They also lend themselves to being driven by low speed power sources. As to that, The Center for Bypassed Technologies has files on a bunch of stuff, including steam, hit or miss engines, and the like, but none of those involve off the shelf-readily available assets.
So we were left with electrical, either with solar panels or with a large primary cell "burning" scrap aluminum in a salt water electrolyte. More on this later.
Now as to the structure.
Floatation (as in buoyancy) is an issue of weight vs displacement. If an enclosed hull of any kind displaces, say, 100 lbs of water, then the hull will hold 100 lbs, (including it's own weight) before sinking. Each of our floats will displace about 450 lbs of water, but we didn't want to tax them to more than half of their capacity. Practically speaking, that gave us about 3800 lbs to play with, including the weight of the barrels (22 lbs apiece) and the frame holding them (about 600 lbs.). Things had to be light, and again, easily and cheaply constructed. For this we turned to several resources. We took from the tiny house movement a lot of their ideas about kitchen layout and the use of sleeping lofts and shared spaces (here see tinyhouseblog.com and others)

For some of the construction techniques we turned to the inspiring works of the ever hyperactive Derek "Deek" Diedricksen at relaxshacks.com. Deek wrote the book .....literally....on unconventional construction and construction from discarded and repurposed materials. His "Humble Homes, Simple Shacks, Cozy Cottages, Ramshackle Retreats, Funky Forts" is full of ideas and inspirations, and i recommend it highly. Check out his Youtube channel, as well has his work on Tiny Yellow House on the MAKE magazine channels.
IN the interests of trying to keep the roof light, we delved into some of the Center's files on historic structures and came up with the classic Gypsy wagon, the Bowtop Vardo.

These graceful canvas roofs are incredibly strong, encompass a great deal of space, and are very lightweight....besides the form is aesthetically pleasing, don't you think?

Instead of the traditional painted canvas, we opted for a modern cast-off equivalent: The incredibly tough and UV resistant advertising covers put on billboards. Billboard tarp is cheap, weatherproof, and easy to work with. In fact, we were able to get hold of 20 mil material originally intended to roof a sports stadium for a relative pittance (check out billboardtarps.com and a few other sites).
Anyway, there in a nutshell are some of the concepts and ideas that influenced this design. We will also be incorporating a number of other ideas, including an 18th century hearth for cooking, the use of wood gasifier burners, composting toilet (of course), and a bunch of other bits of occasionally archaic extreme cleverness. Stay tuned.
Now if the damn rain would just let up for a bit .........
Tuesday, April 1, 2014
A Break in the Weather
Finally, we get a respite from rain and bizarrely late snow and can get some work done. Spent the day working on the stringers that will carry the 1" pipe that holds the barrels in place. These are 2"X6" treated wood, and each had to be drilled with four 1 1/2" holes to fit the pipe.
 We used a foamcore template to mark the drill locations, which saves a great deal of time.
 If you do this, drilling 40+ holes in slightly damp 2" X 6", do yourself a favor: Get a real drill, something in the 6-8 amp range. That orange thing you got at the discount store isn't gonna cut it. As it is, I may still be vibrating this time next week.
 Here's a stack of the drilled stringers and the poly barrels that will go under them. We used a short piece of pipe to make sure things would line up. No sense trying to manhandle 10" sections of pipe just to do an assessment.
Next up, assuming the weather holds, we'll be screwing the stringers between the two 30' 2" X 8" sections that make up the sides of the barge and sliding the pipes into place. More later.
Progress.....finally. At the moment, I need a bath and a glass of wine.
Next up, assuming the weather holds, we'll be screwing the stringers between the two 30' 2" X 8" sections that make up the sides of the barge and sliding the pipes into place. More later.
Progress.....finally. At the moment, I need a bath and a glass of wine.
Subscribe to:
Posts (Atom)